DPF replacement
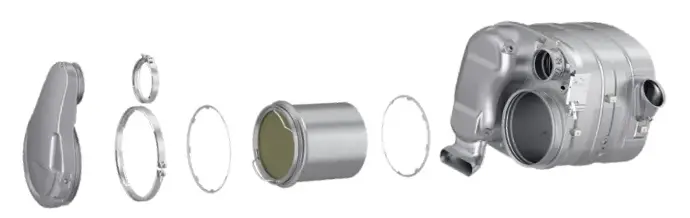
Volvo/Renault schematic is similar to this of other vehicle makes with repleceable DPF filters.
- Uninstallation of the used DPF.
- Uninstall heatshield, clamps, and gaskets to access the used DPF. In certain installations, it may be necessary to uninstall the complete ATS unit to access the used DPF.
- Carefully disconnect any sensors, cables, or hoses.
- Mark the position of DPF covers and clamps, before removing the covers and clamps.
- Uninstall the used DPF.
- Unpack the new or recon RX DPF, including clamps and gaskets, from the cardboard box and plastic bag.
- Reuse the plastic bag and cardboard box for return of the used DPF, clamps and gaskets.
- Repack the used DPF according to the included Dinex Recon RX DPF Return & Inspection Checklist.
- Clean the contact sealing surfaces of the DPF and the ATS unit.
- Install clamps and gaskets onto the DPF according to markings made.
- Install the DPF and tighten the clamps to correct tightening torque.
- Reconnect sensors, cables, and hoses to correct tightening torque.
- Reinstall the heatshield, clamps, and gaskets to complete the DPF replacement.
- Reset the system via the OBD (On-Board Diagnostics) according to the vehicle make specifications.